PoE2 Practical Guide: Rare Monster Minimap, Delirium Duration & Artificer Orbs
Essential PoE2 tips: rare monster minimap display, extending Delirium duration after the 0.5 rework, and Artificer Orb socket crafting explained.
PoE2 Practical Guide: Rare Monster Minimap, Delirium Extended Duration & Artificer Orbs Tips
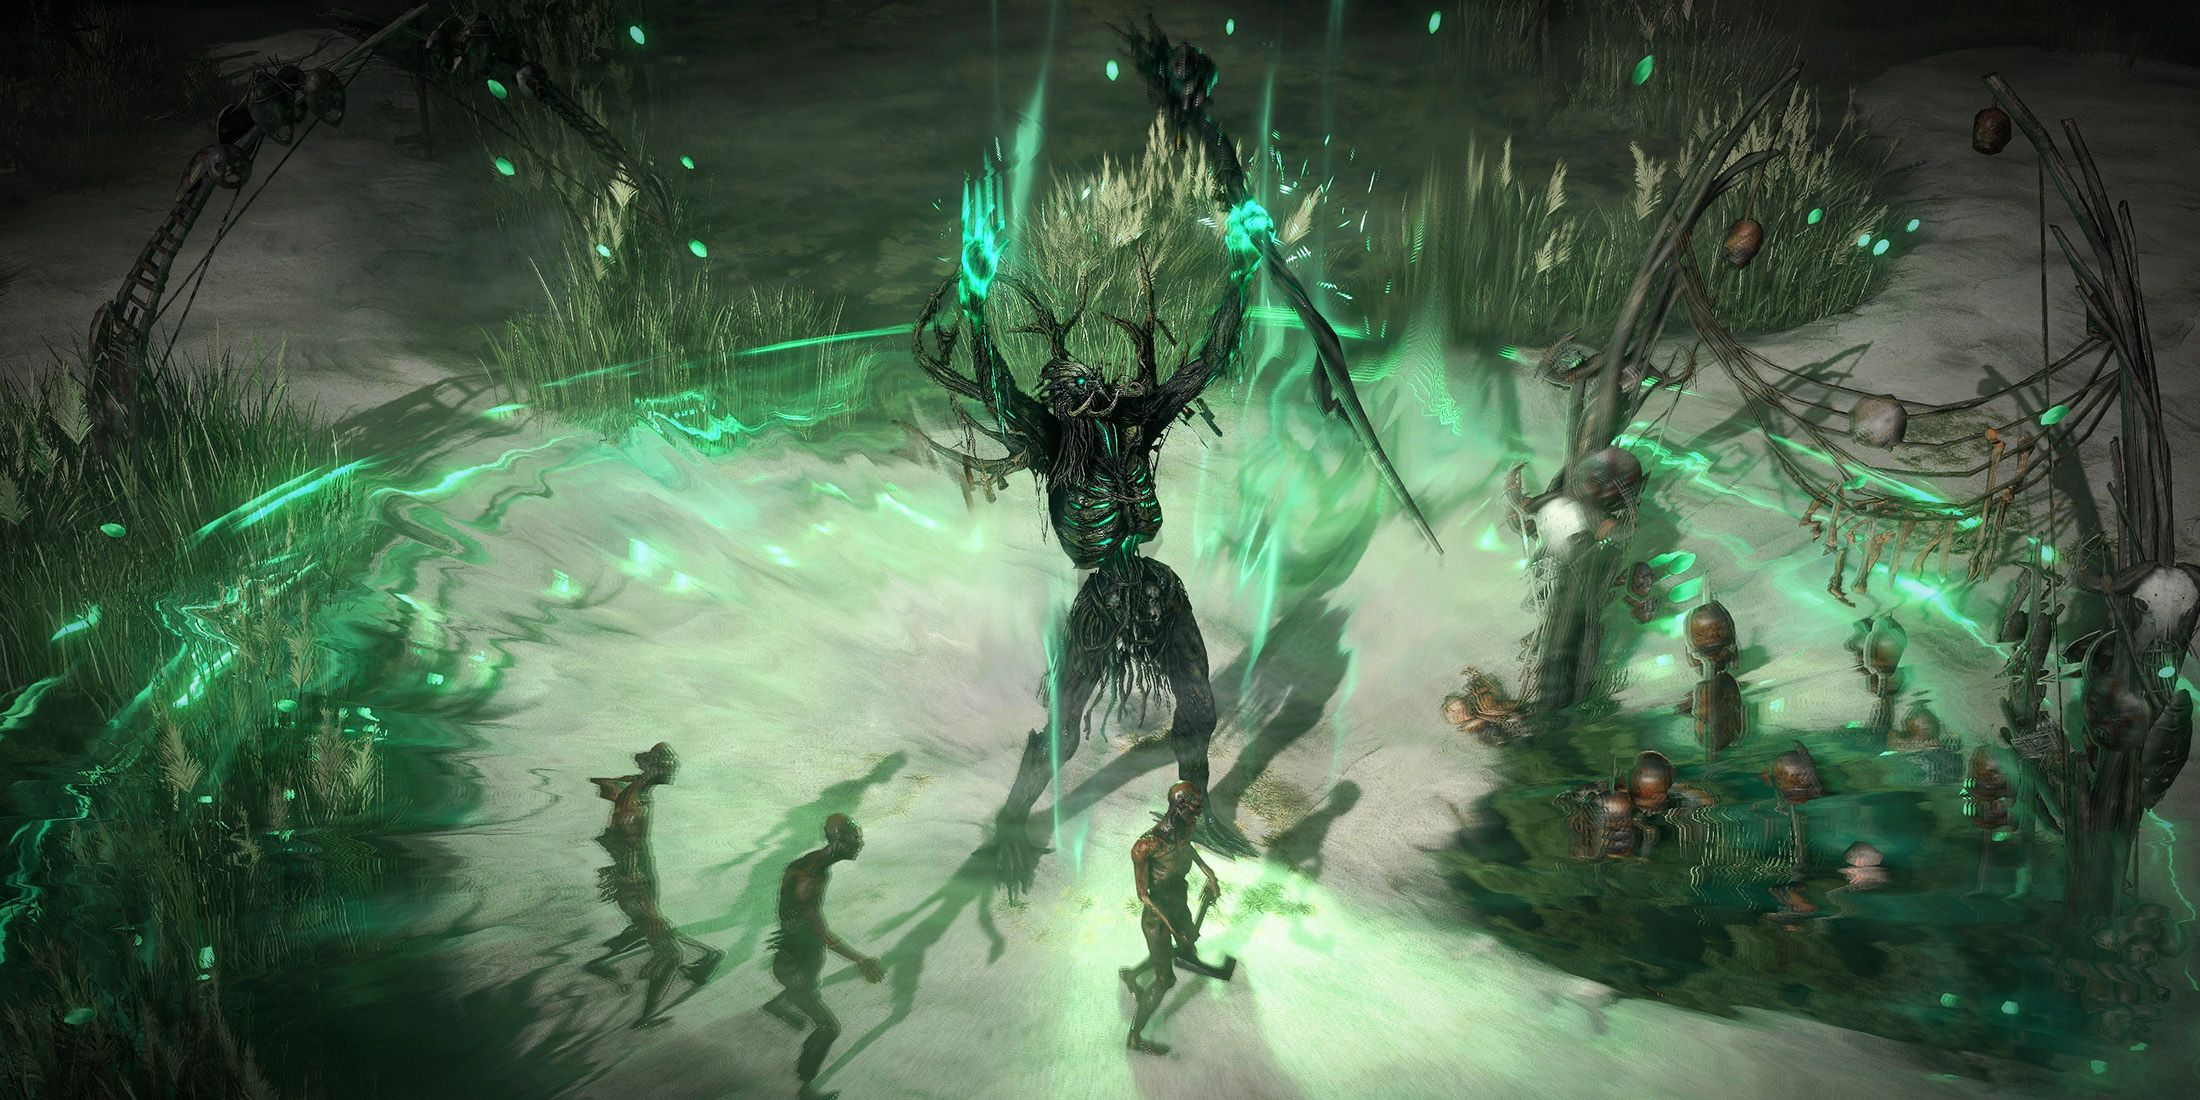 PoE2 endgame map interface: Atlas navigation, minimap icons, and gameplay entry points at a glance
Last Updated: July 21, 2026 · Covers Patch 0.5.4 (Runes of Aldur)
Applies to: Path of Exile 2 — Return of the Ancients (0.5.x)
Path of Exile 2’s 0.5 expansion overhauled the endgame with sweeping changes to Delirium, Expedition, and the socket system. This guide distills three high-impact topics that directly affect your farming efficiency, survivability, and build planning: rare monster minimap icons, the redesigned Delirium/Simulacrum loop, and Artificer Orb socketing strategy. Whether you are just entering the Atlas or pushing 200% Deliriousness on a fully juiced build, these tips will help you make smarter decisions.
Table of Contents
- Rare Monster Minimap Display
- Delirium Duration Extended & Simulacrum Rework
- Artificer Orbs Usage Tips
Rare Monster Minimap Display

Rare monster minimap icon (RareMonsterAlive) — your main marker for finding high-value targets in endgame maps
Rare Monsters have always been a cornerstone of PoE loot — they drop better gear, contribute to atlas encounters, and often gate specific content like Breach or Expedition rewards. In PoE 2, the minimap serves as your primary reconnaissance tool for finding these high-value targets quickly.
Understanding Minimap Icons
PoE 2 displays distinct minimap markers for different monster types. The key icons every endgame player should recognize are:
| Icon Color / Shape | What It Represents | Content |
|---|---|---|
| Yellow diamond | Rare Monster (alive) | General endgame maps |
| Grey diamond | Rare Monster (dead) | Cleared — no longer lootable |
| Orange/Red star | Unique Monster | Story bosses, Pinnacle bosses |
| Purple diamond | Breach Splinters / Breach content | Breach encounters |
| Blue circle | Sentinel / Runic content | Expedition-related |
| Expedition-specific icons | Runic Monster Markers, Expedition Elite, Expedition Boss | Expedition encounters |
| White kite | High-value currency or special items | Loot filter-configurable |
Minimap Common Icons at a Glance

Strongbox

Essence

Shrine

Spirit

Exile

Remnant

Incursion

Ritual

Monolith
PoE2 minimap common icons at a glance: Strongbox, Essence, Shrine, Spirit, Rogue Exile, Expedition Remnant, Incursion, Ritual, and Monolith — knowing these icons greatly boosts your mapping efficiency
These icons are loot filter-configurable via the MinimapIcon directive, meaning community filters like the popular Neversink-style filters or Bart’s PoE2 filter can assign distinct colors and shapes to different item categories, making it easy to distinguish rare monster drops from regular loot at a glance (kosguides.com).
The full list of 597 minimap icons in PoE 2 covers everything from Abyss cracks to Ritual altars (poe2db.tw). For rare monster hunting specifically, the RareMonsterAlive icon (yellow diamond) is your primary target indicator.
0.5 Patch Changes to Minimap Display
The 0.5 expansion and its subsequent hotfixes introduced several notable changes to how rare and special monsters appear on your minimap:
Expedition Runic Monster Markers (Patch 0.5.4, June 25, 2026):
Expedition Remnant activation icon — new in 0.5.4. Grand Expedition modifiers make more runed monster markers appear on the minimap
A new Grand Expedition modifier —“Increased number of Runic Monster Markers” — was added, causing more runic monsters to appear with visible minimap icons during Grand Expeditions. This directly synergizes with farming efficiency, as you can now spot and route to runic monsters before physically engaging them (poe2db.tw).
 Expedition gameplay: explosive route planning + minimap runed monster markers = maximum efficiency
Verisium Sentry Bug Fix (Patch 0.5.4b, July 16, 2026):
A bug where Verisium Sentry minimap icons would persist after activation was fixed. Previously, sentries would continue showing on the minimap even after being used, leading to wasted detours. This fix ensures minimap accuracy during Expedition routing (www.pathofexile.com).
Invisible Monster Bug Fix (Patch 0.5.4):
A bug where some monsters in Expeditions could become invisible and invincible was patched, eliminating the frustrating scenario where a minimap icon led you to a monster you couldn’t interact with (poe2db.tw).
Expedition Atlas Map Icon:
Expedition Atlas endgame map icon — used on the Atlas to identify which ocean maps are Grand Expeditions
A new Endgame Map icon was added to identify which Ocean Maps are Grand Expeditions, visible directly on the Atlas before entering. This helps you pre-plan your Expedition routes and choose maps with the best modifier combinations (poe2db.tw).
Decanter of Madness Fix (Patch 0.5.0b):
A minimap icon for the Decanter of Madness was previously visible before being unlocked, causing confusion. This was fixed so icons only appear when the content is genuinely accessible (pathofexile.com).
Practical Tips for Minimap Usage
Route Optimization in Expedition:
With the new Runic Monster Marker modifier, use the minimap to count visible Expedition icons before committing explosives. If you see 4-5 runic markers clustered together, focus your detonation path there to maximize Remnant yield. The new Liquid Verisium mechanic (purchasable from Farrow after allocating Feeling Lucky? on the Expedition Atlas tree) lets you skip the digging phase entirely and immediately start a Runic Remnant Encounter — use this when your minimap shows poor rune density (poe2db.tw).
Breach Farming:

Breach Atlas icon — the purple diamond marker on the minimap and Atlas represents a Breach
Breach content shows as purple diamonds on the minimap. When running maps with Breach tablets or in areas affected by Breach Strongholds (increased in 0.5.3), sweep the minimap immediately upon entering to locate all Breach hands before committing to a direction. Purple diamond clusters indicate high-density Breach areas worth prioritizing (game8.co).
Delirium Mirror Location:
While Delirium mirrors themselves don’t have a dedicated minimap icon, the fog direction indicates the map boss location. Moving toward the densest fog always leads to the boss. Use this in conjunction with the Delirium Progress bar (introduced in 0.5) to track your depth and shard positions (poe2db.tw).
Pro Tips — Minimap
- Invest in a good loot filter early. The minimap icon system is only as useful as your filter configuration. Set up distinct colors for Rare Monsters (yellow), Breach (purple), and Expedition (blue) to enable instant visual routing.
- The minimap has a limited display radius. Rare monsters near the edge of your minimap’s view may not be visible until you move closer. Clear methodically from the center outward rather than running in straight lines.
- Expedition Runic Monster Markers now correctly scale with Monster Rarity bonuses. If your build or Atlas tree increases rare monster chance, you’ll see more yellow icons during Expeditions — this synergizes powerfully with the new Gaining Traction Expedition Atlas Passive that grants 50% increased Monster Rarity per Remnant Completed (pathofexile.com).
- Summoning Circle encounters now pause Delirium Fog in 0.5.3. If you see a Summoning Circle icon while inside fog, you can safely engage it without losing fog time (game8.co).
Delirium Duration Extended & Simulacrum Rework

Delirium Atlas icon — the Delirium system was completely reworked in patch 0.5
The 0.5 expansion fundamentally redesigned Delirium from the ground up. The most impactful change — and the one that catches returning players off guard — is the massive increase in how long Delirium fog stays active and how the entire Simulacrum loop now functions.
Fog Scaling Overhaul
The Core Change: Fog Difficulty Halved, Then Re-scaled by Tablets
In a design shift that rewards investment while lowering the entry barrier, the scaling of Delirium Fog toughness has been halved across the board. This means early-endgame characters encountering fog for the first time will face significantly less punishing monster damage and tankiness increases (game8.co).
However, to prevent Delirium from becoming trivially easy for invested players, Delirium Tablets now scale the fog effect multiplicatively. Each additional tablet adds back the difficulty that was removed from the base scaling. The critical threshold: when using three Delirium Tablets, the fog scaling returns to its pre-patch value (game8.co).
This creates a clear design philosophy:
- 1 tablet (casual): Much easier than before — great for leveling through endgame
- 2 tablets (moderate): Approaches old difficulty
- 3 tablets (full investment): Same as pre-patch, maximum challenge and reward
Patch 0.5.2 (June 12, 2026) further refined this by halving the toughness of Unique Enemies in fog encounters and halving the damage increase for Normal/Magic/Rare enemies in Delirium encounters, making even full-stack Delirium more manageable (forums.somethingawful.com).
New Simulacrum Mechanics
The Simulacrum received the most dramatic rework of any Delirium component. Here’s what changed and what it means for your runs:
Simulacrum Now Starts at 100% Deliriousness (Scaling to 200%):
Previously intended to scale from 0% to 100% Deliriousness, this system was actually not working correctly and was effectively flat. After patch 0.5.3, Simulacrums genuinely start at 100% and scale up to a maximum of 200% Deliriousness. This represents some of the hardest content in the game — rare monsters at 200% can feel tougher than Pinnacle bosses (game8.co).
Simulacrum Spawn Location Changed:
Simulacrum maps are no longer spawned immediately when you spread Delirium fog on the Atlas. Instead, they now spawn when fog reaches 100% Deliriousness in the fog bank. This means you need to actively clear maps in the fog zone before the Simulacrum becomes available, adding an engagement requirement that didn’t exist before (game8.co).
Wave Count Reduced (15 to 7):
The Simulacrum encounter was reduced from 15 waves to 7 waves, but each wave is substantially harder due to the 100-200% Deliriousness scaling. Each wave layers approximately +5% additional Deliriousness, meaning the final waves are significantly more dangerous than anything in the old system.
New Shard Selection System:
The most strategically important addition: between waves, you now choose from one of three shard options (unlocked via the “You can’t just wake up from this one” Notable on the Delirium Atlas Passive Tree):
| Shard Type | Effect | Risk Level | Best For |
|---|---|---|---|
| Escalating Threats | Adds an additional area modifier (generally increases danger and reward) | Medium | Players with strong defensive layers |
| Apex Predators | Adds an additional boss to the encounter | High | Boss-killers, high single-target DPS builds |
| Pure Emotions | Adds additional monster packs to the encounter | Low-Medium | AoE-focused builds, splinter farmers |
The “Are you sure you want to do that?” notable was also reworked: it now grants a 20% chance that shards within Simulacrums allow multiple selections (previously it doubled tablet effects in Grand Mirror areas) (game8.co).
Grand Mirror Changes:
Grand Mirrors now create an additional Delirium Mirror in the affected area (instead of the old “tablets have double effect” bonus). This means more mirror activations per map, more fracturing mirror shards, and ultimately more Simulacrum Splinters per run (game8.co).
Tablet Strategy & Atlas Passive Investment
Based on the new mechanics, here’s the optimal investment path for Delirium farming:
Tablet Priority (Highest to Lowest):
- “Fracturing Mirrors increased (5-10%)” — More mirrors mean more monster packs and more splinters. This is your primary profit driver.
- “Splinter Stack Size increased (5-10%)” — Directly multiplies your splinter gains per encounter. Every fracturing mirror shattered yields more.
- “Chance for additional Unique Boss” — Useful for liquid emotion farming (Kosis, Omnophobia drops).
- Skip the expensive “rare monsters” tablet mod — it ran 20+ Divine Orbs at peak league pricing; roll map crafting for monster rarity instead for comparable effect at a fraction of the cost.
Atlas Passive Tree Investment Order:
- Unlock “You can’t just wake up from this one” first — the between-wave shard selection is now essential for Simulacrum optimization.
- Invest in “Are you sure you want to do that?” for the 20% multi-select chance on shards.
- “You thought you were free?” (25% chance an additional Simulacrum transforms at 100% Deliriousness) — effectively gives you 1.25x Simulacrum yield per fog cycle.
- Fog spread nodes for covering more maps with fog to accelerate Simulacrum availability.
- Pure Escalation unlock — these shards now enhance ALL normal shards to release Pure Emotion monster packs (not just bar shards), dramatically increasing splinter density (game8.co).
Efficient Farming Loop:
- Find a City biome cluster on your Atlas (near Citadels).
- Use Delirium Precursor Tablets to spawn a Grand Mirror.
- Complete it — kill the boss, click the mirror to spread fog.
- Run maps in the fog zone, pushing Deliriousness from 0% to 100% to 200%.
- Once the Simulacrum spawns at 100%, run it on a 6-mod map for best value.
- Use Jado as Atlas Master for corrupted waystone bonuses and tablet suffix amplification.
- Boss-rush Citadels and Matriarch Halls with waystone drop tablets swapped in.
Pro Tips — Delirium
- Clear the map first, then activate the mirror. Walk to the boss without engaging, return to the mirror, activate it, then rush back and finish the boss at 100% deliriousness for maximum loot.
- Don’t leave loot on the ground before starting a Simulacrum — anything dropped gets deleted when the encounter begins.
- A 6-mod map sometimes drops two boss keys instead of one. Corrupted 8-mod maps may push this even higher, significantly increasing Simulacrum profitability.
- Summoning Circle encounters pause the fog timer. Engage them aggressively — free progress with no fog cost.
- Pushing past 100% to 200% Deliriousness produces some of the hardest content in the game. Only attempt this with strong AoE damage, high defenses (Evasion excels here), and solid recovery.
- Pure Escalation shards now have visible purple glassy energy when enhanced, making them easy to spot and prioritize during encounters (game8.co).
Artificer Orbs Usage Tips
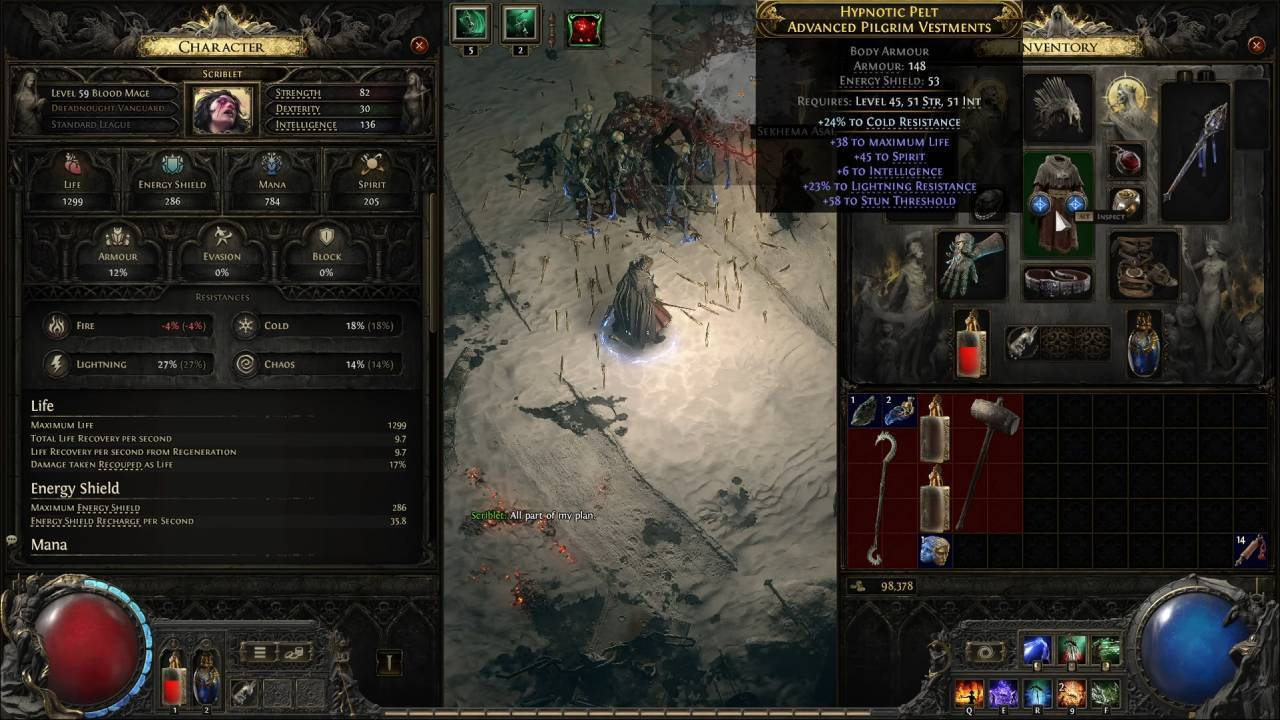 PoE2 character equipment interface: the Augment Sockets on every equipment slot are key to raising your power — Artificer Orbs are used to unlock these sockets
The Augment Socket system is one of PoE 2’s most distinctive gear customization mechanics — and Artificer’s Orbs are the primary currency for unlocking it. Understanding socket limits, acquisition methods, and optimal socketing priorities can dramatically accelerate your build’s power curve.
Socket Limits & What Can Be Socketed
Every piece of equipment in PoE 2 has a maximum number of Augment Sockets it can hold. Here’s the complete breakdown:
| Equipment Slot | Max Sockets | Notes |
|---|---|---|
| Martial Weapons (Swords, Axes, Maces, etc.) | 2 | Highest priority — weapon stats scale directly with DPS |
| Body Armour | 2 | Second highest priority — defensive stats stack well |
| Gloves | 1 | Situational — life/mana leech or skill-specific bonuses |
| Boots | 1 | Movement speed or resistance bonuses |
| Helmet | 1 | Common picks: life, resistances, or skill-specific |
| Shield | 1 | Defensive bonuses |
| Focus (Foci) | 1 | Energy shield or caster-specific bonuses |
| Total Full Set | 7 | 2 weapon + 2 body + 1 each gloves/boots/helm |
Items that CANNOT receive Augment Sockets:
| Item Type | Reason |
|---|---|
| Caster Weapons (Wands, Sceptres, Staves) | Not classified as Martial Weapons |
| Quivers / Arrow Quivers | Not eligible |
| All Jewelry (Rings, Amulets) | Not eligible — use Idols/Talismans instead |
| Belts | Not eligible |
Note: Some Unique items and Corrupted items may have more Augment Sockets than the normal maximum. Vaal Orb corruption can push an item beyond its socket limit (game8.co) (icy-veins.com).
How to Get Artificer’s Orbs
| Method | Details | Efficiency |
|---|---|---|
| Salvage Socketed Items | Use the Salvage Bench (any settlement or hideout) to break down any item with Augment Sockets — yields Artificer’s Shards | Best early-game method. Salvage every socketed drop you don’t need. |
| Shard Synthesis | 10 Artificer’s Shards automatically combine into 1 Artificer’s Orb | Passive income while salvaging |
| Currency Exchange NPC | Available in every Act after completing Act 3. Exchange other currencies for Artificer’s Orbs | Reliable but expensive in early acts |
| Random Drops | Artificer’s Orbs and Shards can drop from any monster or boss | Unreliable as primary source |
| 0.5 Runes of Aldur Recipe | Craft via Runeshape: Arcane Rune (Lv1-16) + Storm Rune (Lv15-40), or Volcanic Rune (Lv1-16) + Illusion Rune (Lv15-40), or higher-tier recipes with Rock + Illusion + Prism Runes | Available after unlocking Runes of Aldur system |
Early Game Shard Collection Strategy:
The most efficient way to stockpile Artificer’s Shards in the early endgame is to salvage every piece of socketed equipment you don’t immediately need. This includes:
- Any dropped gear with visible augment sockets
- Upgraded gear you’ve replaced
- Low-tier rare items with sockets (the mods don’t matter — only the sockets count for shard yield)
By the time you reach Tier 11+ maps, you should have accumulated enough shards from salvaging to fully socket your core 7-slot setup without needing to purchase orbs.
Runes vs Soul Cores — What to Socket
Once your sockets are open, the question becomes: what goes in them? PoE 2 offers three categories of socketable items:
| Category | Best Use Case | Examples |
|---|---|---|
| Runes | General stat bonuses (resistances, life, damage). Cheap and widely available. | Body Rune (+45 Life on armor), Iron Rune (+20% Phys Damage on martial weapons), Desert Rune (+14% Fire Resist on armor) |
| Soul Cores | Specialized, powerful effects. Often build-defining. | Soul Core of Quipolatl (5% Attack Speed on weapons), Soul Core of Jiquani (2% max Life on kill), Soul Core of Topotante (15% Elemental Penetration on weapons) |
| Idols | Unique interactions tied to specific slots. Limited availability. | Fox Idol (+2% Quality on Body Armour), Bear Idol (+8% AoE on Helmets) |
Priority Socketing Strategy:
- Weapons first — Socket Iron Runes (physical builds), elemental Runes (elemental builds), or key Soul Cores like Quipolatl (attack speed) or Topotante (penetration). Weapon socket bonuses directly multiply your DPS.
- Body Armour second — Body Runes for life, elemental Runes for resistance gaps, or Greater Body Runes for maximum life stacking.
- Fill remaining slots based on your build’s weakest defensive layer — usually gloves (leech), boots (movement/resistance), or helmet (life/skill bonuses).
Kalguuran Gems (Season New):
The 0.5 season introduced Kalguuran Gems, which provide stat bonuses without requiring sockets. These are valuable for builds that don’t want to invest in the socket system or for filling gaps on items that can’t be socketed (jewelry, belts, caster weapons). However, traditional builds still heavily depend on sockets for their core power spikes — Kalguuran Gems complement rather than replace the socket system.
Alternative Socketing Methods
Beyond Artificer’s Orbs, two other methods can add sockets:
| Method | How It Works | Risk Level | Source |
|---|---|---|---|
| Vaal Orb | Corrupts the item. One of four possible outcomes: no change (~25%), modifier reroll, corrupted enchantment, or adds an extra socket beyond the normal limit | High — 75% chance of a non-socket outcome, and rerolls can ruin the item | Random drops from any enemy |
| Architect’s Orb | Corrupts an already-corrupted item (double corruption). 50% chance to add a second corruption enchantment, 50% chance to destroy the item entirely | Extreme — you lose the item on failure | Drops from Tier-3 rooms or Atziri’s Vault in the Vaal Temple |
Important: The Vaal Orb’s “extra socket” outcome bypasses normal socket limits, meaning you can get 3 sockets on a weapon or 3 on body armour if you’re lucky. This is how top-end players achieve “beyond limit” gear. However, this is a gambling mechanic — use Hinekora’s Lock to preview the outcome if you can afford it (outof.games).
Pro Tips — Artificer Orbs
- First guaranteed 4-socket item comes from the Orok Campfire chest in Act 3. Plan your early socket strategy around this.
- Prioritize your martial weapon. A fully-socketed martial weapon with Iron Rune + Soul Core of Quipolatl provides massive damage scaling that no other slot can match.
- Don’t waste Artificer’s Orbs on leveling gear. Wait until you have your endgame weapon and armor before socketing. Use Kalguuran Gems or basic Runes during leveling.
- Salvage bench is your best friend. Set a habit: every time you pick up a socketed item you don’t need, salvage it immediately. Over a few hours of mapping, you’ll accumulate 20-40 shards passively.
- The 0.5 Runeshape recipe for Artificer’s Orb uses low-level Runes (Lv1-16 Arcane + Lv15-40 Storm, or Lv1-16 Volcanic + Lv15-40 Illusion). Stockpile these runes from Expedition content to craft orbs on demand instead of relying solely on salvage.
- Some Augments cannot be socketed into Corrupted or Sanctified items. In 0.5.4, GGG restricted specific Augments (Astrid’s Creativity, Katla’s Gloom, Kolr’s Hunt, Medved’s Tending, Raven-Touched Shard, Serle’s Triumph, Thrud’s Might, Uhtred’s Sidereus, Vorana’s Carnage) from being socketed into items that cannot be modified. Plan your corruption strategy accordingly (poe2db.tw).
Quick Reference Summary
| Topic | Key Takeaway |
|---|---|
| Rare Monster Minimap | Yellow diamonds = rare monsters. Use loot filters for custom icons. Expedition Runic Markers now scale with Monster Rarity. Verisium Sentry icons fixed in 0.5.4b. |
| Delirium Duration | Fog scaling halved base, but 3 tablets = old difficulty. Simulacrum now starts at 100% and scales to 200% (the intended 0-100% scaling was broken). Between-wave shard selection is a game-changer. |
| Artificer Orbs | 7 total sockets across full set (2 weapon, 2 body, 1 each gloves/boots/helm). Salvage socketed gear for shards. Weapons first, then body armor. Vaal Orb can exceed limits. |
Sources
- (poe2db.tw — Version 0.5.4 Patch Notes)
- (pathofexile.com — 0.5.0b Patch Notes)
- (pathofexile.com — Content Update 0.5.0)
- (www.pathofexile.com — 0.5.4b Patch Notes)
- (game8.co — 0.5.3 Patch Notes Summary)
- (game8.co — Gear Sockets Explained)
- (game8.co — How to Get Artificer’s Orb)
- (poe2db.tw — Delirium)
- (poe2db.tw — Minimap Icons)
- (icy-veins.com — Currency and Crafting)
- (outof.games — What Does Corrupted Mean)
- (Official 0.5.4 Hotfix 3 Forum Thread)
- (poe2.dev — Gear Sockets & Runes)
This guide is maintained for the PoE2Path community. Data reflects patch 0.5.4 as of July 2026. Always verify in-game mechanics against the latest official patch notes, as GGG frequently adjusts values between patches.
Was this guide helpful?
Help us improve PoE2Path with your feedback.